I get the Space Float, Omega Stabilizer, Automatic Gear, #1 Ionium Jet
and the Gravity Jumper. I also knock down two stone walls. A few monsters
are killed.
Footage of all of the days together is available here.
The most I've bred on this day is 30 Pikmin - it should be possible to more than
double that.
Challenges
The Puffstool is one of those monsters that frequently kills a few Pikmin
for no discernible reason. It seems like he rolls on them when he's upside down,
but the lack
of ascending ghosts makes it hard to tell for sure. I kill him near the
beginning to minimize the risk.
Difficulty
I've been trying this level again and it is difficult. Being able to reliably
kill the Puffstool is crucial. Practice this on its own until you can kill him
with zero deaths at least half the time.
What to do
Take out a hundred red Pikmin, put nine to ten on the wall near the ship, then
kill the Shearwigs, and kill all of the
Fiery Blowhogs.
For the Shearwigs I find it very helpful to rotate the camera 180 degrees
before entering the narrow canyon - this gives a much better view of the battle
than if the camera is facing the way you are going.
Kill the Wollywog
that is near the fiery blowhogs, because he seems to be easy to kill
on land, and is somewhat dangerous to leave alive.
If you see the
Breadbug
be sure to throw some Pikmin on his back to damage him and then send a few Pikmin to drag him home by his pellet.
Getting rid of him before you try breeding blue Pikmin is a great help.
Now go to the nectar grass near the bridges at the far end of the sand. This is a good time
to turn your Pikmin into flowers, and it stops the nectar grass from distracting your Pikmin
later.
Now head towards the Puffstool, taking out all the
Shearwigs,Sheargrubs, and
Wollywogs
along
the way. Kill the Wollywog first, and then slowly move in on the Sheargrubs and Shearwigs.
If you try to attack too many at once you will lose control of the battle. Go towards them enough
to wake them up and then retreat as needed to a safe battleground. You could harvest some of the
carcasses for food - especially the Shearwig carcasses, which are some of the most
nutritious food
(Pikmin produced compared to Pikmin required to carry) in the Pikmin world.
Kill the Puffstool
and send fifty guys back with the Omega Stabilizer. You could also throw a bunch of guys on the Puffstool,
since this is another concentrated source of food.
Put no more than twenty guys on building the bridge to the Gravity Jumper - it's important to have enough
others available to do other work. It's safer to put fewer Pikmin on the bridge - maybe fifteen.
When you get back home you should have thirty guys (some with you, some who dragged back the
Breadbug, and others who were building the wall). If some are carrying back food
you may need to grab them on the way, rather than waiting for them to walk around.
The Puffstool carcass in particular will not have time to get all the way back - you can pick
its nutritious body up later, when you come back for the Gravity Jumper.
Carry the Space Float to the ship, and the Breadbug to the onion.
Now put away fifteen Pikmin (to make room for breeding blues - make sure that no food
is incoming at this point) and throw the other fifteen on the twig pole that points at the
Automatic Gear. If you didn't have thirty Pikmin with you at this point you have a problem.
If any food packets are incoming they may make it impossible to breed enough blue Pikmin.
This is crucial.
Then go breed blue Pikmin - using Olimar to knock down flowers when appropriate, hitting
the flower heads with Pikmin to knock them down quickly. If you're feeling ambitious
you could harvest a couple of the Shearwigs
from the battle in the morning - if you don't have to pick their flowers then this costs you very
little time. When you get fifteen you should take them to
get the #1 Ionium Jet.
The Omega Stabilizer and the fifty red Pikmin carrying it should be back now. Put
some reds away and take out twelve to fifteen yellows. Take at least twenty reds and
the yellows down to the now completed bridge near the Gravity Jumper. Taking more
than twenty reds is wasteful, unless you plan to use the extras to carry back food.
Babysitting extra Pikmin will slow you down. So will getting reds to carry back extra
food, but it is tempting to be greedy...
After sending the Gravity Jumper back, take your
yellows (there should be no other Pikmin with you now) past where the Gravity Jumper was and over the edge
to where the bomb rocks are - don't bother building the second bridge.
Get at least twelve bomb rocks. Throw the yellows up the cliff, then go around
and fetch them. If you whistle for them at this point you will get the simultaneous explosion
of twelve bomb rocks, which appears to overload the Game Cube audio system quite nicely.
Take your fifteen yellows up the path to the entrance to Beady Long Legs' lair. The road
to his lair should have been cleared of monsters when you went to kill the Puffstool.
Blow up the wall, using the C-stick to steer the Pikmin away from the flame jets - or
they may burn themselves up after dropping bomb rocks.
After blowing up that wall, head back towards the Onions and blow up the white wall near the yellow
Onion. That saves a lot of time when returning parts on day six. If you feel like you have spare time,
and if you have spare bomb rocks (you need six for each wall, so you may have three left over) you can
throw the extras at the wall blocking the way to the Libra, to save you time on day 6. However this is
completely optional, and probably better spent on harvesting food.
You should have some time left. You can use it to harvest nearby flowers, but sucking up some nearby nectar
may be more important.
You're done.
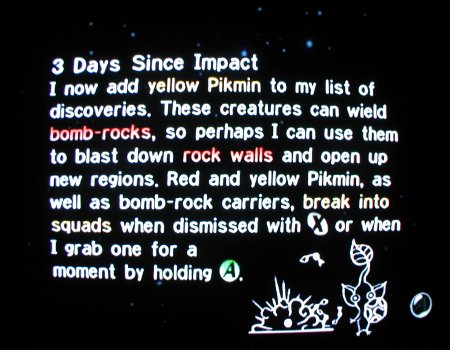
You should get this screen after day three - clearly it isn't tied very well to actual
events in the game.